

How to Remove Unwanted Objects from Photos with AI
A practical guide to removing distractions from photos with AI while keeping the rest of the scene believable.
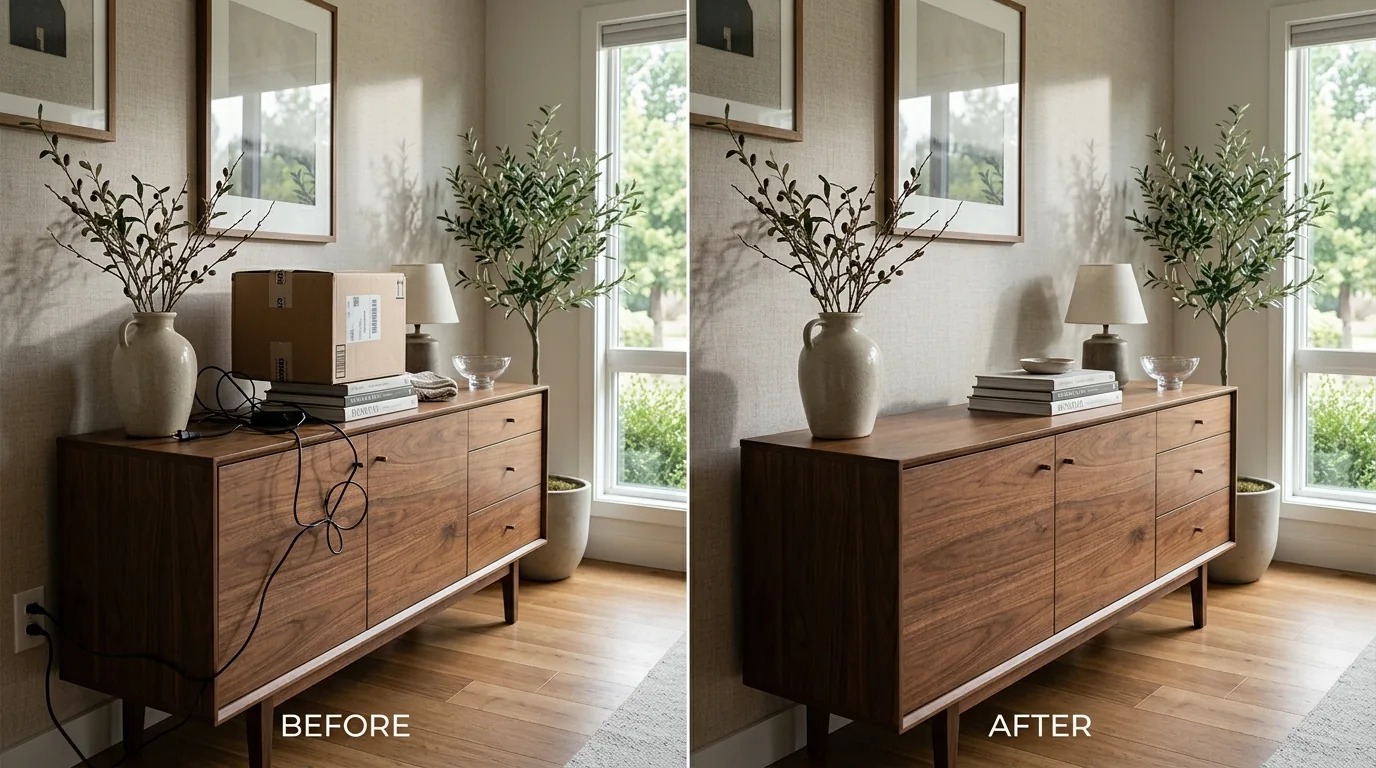
Learning how to remove unwanted objects from photos can save an otherwise useful image. A stranger in the background, a delivery box near a product, or a sign that pulls focus can change how a picture feels. The most convincing edit does not simply erase something. It fills the space with a background that looks as though the object was never there.
An AI image changer is useful for this kind of targeted cleanup because you can describe the object to remove and keep the rest of the scene as the reference. The quality of the result still depends on the photo, the size of the object, and how much visual information the model has around it.
Start by deciding what should stay
Before asking an AI to remove anything, identify the parts of the image that must not change. In a product shot, that may be the label, packaging, and the surface beneath it. In a travel photo, it may be the people in the foreground, the horizon, and the lighting.
This matters because a vague instruction such as "clean this up" leaves too much open to interpretation. A focused instruction gives the tool a boundary: remove the unwanted element, reconstruct the surrounding area, and preserve everything else.
What kinds of objects are good candidates?
Object removal is most reliable when nearby background details provide clues for the missing area. Good candidates include a person in the distance, small clutter on a table, a cable across a wall, a parked vehicle, or a distracting sign. Repeating textures such as sky, grass, plain walls, or flooring are often easier to reconstruct than a detailed pattern hidden entirely behind a large object.
Slow down when the removed area contains a face, a hand, important text, a product label, or a complex architectural edge. In those cases, make a smaller edit request first and inspect the result at full size.
Remove an object in three steps
1. Upload the best original you have
Open ImageChanger's AI object remover and upload the highest-quality source image available. A sharp original gives the model more detail to use when rebuilding the background.
2. Name the object and protect the scene
Describe the object as precisely as possible, then state what should stay. Here are two examples:
Remove the person standing behind the chair. Reconstruct the wall and floor naturally. Keep the seated subject, chair, lighting, and composition unchanged.
Remove the cardboard box on the left side of the table. Fill the surface naturally and preserve the product, label, shadow, and camera angle.
If the object is small, include its position. "Remove the cable in the lower right corner" is more useful than "remove the cable." If the first result is too broad, make the instruction shorter and emphasize the elements to retain.
Remove an unwanted object with ImageChanger free →
3. Inspect texture, edges, and repetition
After generation, look for repeated patterns, broken straight lines, or a texture that becomes too smooth. Walls, tiled floors, shelves, and patterned fabric reveal errors quickly. Also check the edge around nearby people and products: an effective removal should not reshape the subject you meant to keep.
For a difficult image, try one removal per generation rather than asking for a long list of changes. Smaller, verifiable edits are easier to compare and refine.
Three useful cleanup workflows
Product photos
Remove shipping materials, loose cables, background clutter, or reflections that compete with the item. Once the image is clean, you can use the background replacement tool to test a different setting without changing the product itself.
Travel and personal photos
Remove an accidental passerby or a small distraction that changes the balance of the frame. Keep expectations realistic when a large object covers important landmarks; the generated area should always be reviewed before you share it.
Social and campaign assets
Clean a source image first, then create derivatives for different layouts. This is often more controllable than trying to make every edit, crop, and style change in one instruction.
AI removal versus manual retouching
Manual clone and healing tools are still helpful for tiny, predictable fixes. They give an experienced retoucher direct pixel-level control. AI removal is a faster way to explore larger or more complex cleanup work, especially when you want a plausible fill rather than repeated manual sampling.
Neither approach guarantees a perfect result. Use the method that gives you the best reviewable output for the image and the level of precision the job needs.
Make the edit, then make the decision
The practical test is simple: if a viewer sees the final image without looking for an edit, does the scene still feel coherent? Upload a source image, name the distraction, and review the generated background before using it publicly.